Saturday, December 29, 2007

My Favorite Cookie

EVER!!
Monster Cookies!
I am a lover of cookies. I love trying new recipes, but this one I crave more than all the others. I love the combination of Peanut butter and Oatmeal. I am not sure why they are called Monster Cookies, that is what my mom always called them.
I love this recipe for looks, texture and definately taste!

This recipe is so versitile and you can really make it your own (just like the Basic Blondies)! The peanut butter taste is not overwhelming but provides a subtle backround flavor that pairs nicely with whatever you choose to stir into this recipe. The oatmeal provides a great texture without being too grainy as some can be. These are enjoyed by adults and kids alike!

Monster Cookies
½ cup butter, room temp
1 1/4 cup brown sugar
3/4 cup sugar
3 eggs
1/8 cup vanilla extract
1 1/2 cups peanut butter (I like Creamy)
1 tsp baking soda
4 ½ cups oatmeal (quick cooking or old fashioned)
Add-ins should equal 1 -2 cups total:
(I used 1/2 cup chocolate chips and 3/4 cup Reese's Pieces Holiday Edition)
chocolate chips
white chocolate chips
butterscotch chips
PB chips
M&M's
Reese's Pieces
Nuts (walnuts, peanuts, pecans)
Raisins
Craisins
Preheat oven to 350.
In mixing bowl, combine butter and sugars until blended. Add eggs and vanilla. Beat until combined.
Add Peanut Butter and baking soda. Beat until combined.
Slowly add oatmeal. Blend in as much as you can with mixer and fold in the rest by hand along with your choice of Add-ins.
Drop on parchment lined baking sheets and bake for 8-10 minutes until light brown and just set around edges. Cool on counter. Store in tupperware with slice of bread (not touching cookies) to keep soft and chewy for a few days.

Pour some Sugar on Me

Sugar Cookies!!!
I found a keeper! I have only baked these once, but trust me, they WILL be made again sooner than later!
I am a lover of all sweets at the holidays as my tight fitting clothing this week proves. I have always loved my mom's crisp sugar cookies with a gentle sprinkling of sugar, I still do.

But every now and then I am in the mood for a nice thick and chewy sugar cookie topped with frosting. I have tried many recipes but these fit that bill! The dough was sooo easy to work with and did not require chilling before rolling (time saver!). These cookies are soft and have an amazing butter flavor lacking in many sugar cookies in my opinion. I know the Holidays are over, but do yourself (not your waistline) a favor and bake up a batch of these today. Use a non-holiday cookie cutter and these can be enjoyed year round! Yeah!!
Famous Sugar Cookies
1 cup butter (VERY soft)
1 cup sugar
1 large egg
1 tsp vanilla extract
2 3/4 cups flour
2 tsp baking powder

Preheat oven to 375.

In a small bowl stir together the flour and baking powder. Set aside.
In mixing bowl beat butter until soft and smooth. Add in sugar and beat to combine. Add egg and vanilla and beat until just combined. Add flour mixture. Beat until just combined and dough is smooth.
Turn out to floured work surface and roll to 1/3" thickness. Use cookie cutter to cut desired shapes.
Place cookies on baking sheets and bake for 6-9 minutes until beginning to brown on bottom and around edges. Don't overbake or they will be crisp. Tasty, but crisp.
Cool on counter.
Once cooled, frost with desired frosting. I used this one:

Famous Frosting
4 oz. Cream Cheese, softened
1/2 stick butter, softened
1 tsp vanilla extract
1/4 tsp salt
2 cups powdered sugar (sift after measuring)
*whipping cream to thin if needed
In a small bowl, combine cream cheese, butter, vanilla and salt. Beat until combined. Slowly beat in powdered sugar until well combined. Add more powdered sugar or whipping cream until desired consistency is reached.


Stir in food coloring if desired. Frost cookies. Allow to set for 20-45 mintutes before storing.


Little Bites of Heaven

in the form of mini Pecan Pie Muffins! I must say that these are by far some of the tastiest muffins I have ever had the pleasure to enjoy. Everyone at church raves about them when I bring them to potluck breakfasts.


Why mini? Well, they are just so darn cute and these little babies pack loads of flavor and often one mini is enough to satisfy me. Their size makes them easy to transport (I have used empty egg cartons) perfect for breakfast/brunch potlucks when people want to taste a little of everything. Most people go back for "just one more" of these muffins as they can't seem to get enough!

These are by NO means a healthy breakfast muffin (is there such a thing anyway??) but because they are made into mini muffins, you can easily enjoy one with a bowl of fruit and a glass of skim milk to balance out the sugar/butter in these little babies.

I got the recipe from allrecipes but changed it up a bit. My changes are in red. http://allrecipes.com/Recipe/Pecan-Pie-Muffins/Detail.aspx

Mini Pecan Pie Muffins
1 cup packed light brown sugar
1/2 cup all-purpose flour
1 cup chopped pecans (I used 1/2 cup ground, 1/2 cup chopped)
2/3 cup butter, softened
2 eggs, beaten

1/2 cup brown sugar
1/2 TBS ground cinnamon
1/4 cup ground pecans
Preheat oven to 350 degrees.
Grease and flour 18 mini muffin cups or line with paper muffin liners. (I greased and floured, do this or they will stick!)

In a medium bowl, stir together brown sugar, flour and pecans. In a separate bowl beat the butter and eggs together until smooth, stir into the dry ingredients just until combined. Spoon the batter into the prepared muffin cups. Cups should be about 2/3 full.

In a small bowl wisk together 1/2 cup brown sugar, 1/2 TBS cinnamon and 1/4 cup ground pecans. Gently sprinkle over top of muffin batter. Make sure not to get a lot on the pan or it will burn and stick making clean-up hard.

Bake at 350 degrees for 20 to 25 minutes. Cool on wire racks when done. I let cool in pan for 2 minutes and then transfered to rack to finish cooling. Take care when removing from pan as they are delicate and will fall apart easily. I used a toothpick to pry them loose from the sides of the pan when needed.


Sunday, December 16, 2007

Better Than..........

Sex Cake.

There are many names for this cake and many variations. My mom used to refer to this as Better than Christmas cake so my sisters and I could ask for dessert without it sounding "R-rated" or spurring a discussion about the "Birds and the Bees" at the dinner table; especially so when we had friends over.
This cake is my sister's absolute favorite cake. She requests it every year for her Birthday cake. It is so simple to make as it starts with a boxed cake mix, although a homemade one would work as well, but why put in the extra effort when the cake is really just used as a "sponge" to soke up all the ooey gooey goodness in this recipe. I would prefer to bake a cake from scratch when I can truly enjoy its flavor and texture.

As I have said, this cake has many variations and is so versitile. Some recipes call for a yellow cake mix, pineapple and coconut, others use German chocolate cake mix. The possiblities are endless. I will admit that the Yellow cake mix version does not appeal to me in the slightest so I stick to the Chocolate variety. The thing I love about this cake is the longer it sits in the fridge the more moist and delicious it becomes! How many cakes can say that?? This cake is so moist, rich and oh so good. In an attempt to "lighten" it up a bit (especially since the holiday goody consumption is around the corner and my jeans are already a little snug) I modified my usual "recipe" My changes in red.

Better than Christmas Cake
1 boxed Triple Chocolate Fudge Cake Mix (Betty Crocker)
Water, eggs and oil called for with cake mix *I used 1 can Diet Coke in place of all water, eggs and oil
1 12 oz. jarred Caramel Sauce *I used Sugar Free
1 can Sweetened Condensed Milk * I used Fat Free Bordens Sweet and Condensed Milk
1 Butterfinger bar, crushed
1 Skor bar, Crushed
1 tub Coolwhip, thawed *I used Sugar free
1 cup mini chocolate chips

Bake cake according to package directions for a 9x13 pan until a few crumbs come out on a toothpick inserted in center.
After removing cake from oven, use the back of a wooden spoon and poke several holes in the cake, making sure not to go all the way to the bottom of the pan or the carmel and milk will pool and stick to the pan making it hard to serve.

Stir together in a bowl the carmel sauce and Sweet and condensed milk. You can heat carmel slightly in the microwave to make it easier to mix.
Evenly pour mixture over the entire cake making sure to pour some into the holes you poked.
Sprinkle the crushed candy bars evenly over the cake. Cover and refridgerate until ready to serve. Best if allowed to chill overnight.


When ready to serve, frost cake with Coolwhip and sprinkle with mini chocolate chips.

*I like to allow the cake sit out at room temperature for about 15-20 minutes before serving to allow the carmel/milk mixture to warm a bit and create a gooey sauce through out the cake.


Wednesday, December 5, 2007

Channeling Grandma


So, as many of you bloggers may know Peabody from http://www.culinaryconcoctionsbypeabody.com/ is having a virtual open house this Saturday December 8th. In order to attend, you must bring a potluck dish. After much thought and consideration I decided to try my hand at something I have never baked before: a yeast bread.

I enviously drool over the baked items on Peabody's blog and admire her baking abilities almost as much as I envy my grandmother's ability to bake bread like no other. So, I thought this open house would be the perfect time to try my hand at a loaf of yeast bread. Who doesn't love the smell of fresh bread filling a room? So, with that plan in mind I phoned my grandma who sadly informed me that she has no recipe and adds ingredients by sight and feel. Well, a lot of good that does me as she lives 8 hours away!


I decided to turn to http://www.allrecipes.com/ to find a basic white yeast bread recipe. Normally I would buy whole wheat bread, but as I had no whole wheat flour at home, I decided on this recipe http://allrecipes.com/Recipe/Amish-White-Bread/Detail.aspx

Let me tell you this bread ROCKED and I will be making more yeast breads in the future! It had a nice crisp crust, soft dense interior that held up perfectly to a generous slathering of Peanut butter at breakfast.


While bringing a loaf of this delicious bread to an open house would be welcomed, I decided to turn one loaf into bite sized grilled cheese. These little beauties are perfect for passing around at a Housewarming Party with a dab of Ketchup (although I would prefer to have these bite sized morsels with a shot glass full of Roasted Tomato Soup!, Maybe next time
because there WILL be a next time!)


Amish White Bread
2 cups warm water (110 degrees F/45 degrees C)
2/3 cup white sugar (I used 1/3 cup based on reviews and my grandma's advice)
1 1/2 tablespoons active dry yeast
1 1/2 teaspoons salt
1/4 cup vegetable oil
6 cups bread flour

In a large bowl, dissolve the sugar in warm water, and then stir in yeast. Allow to proof until yeast resembles a creamy foam.

Mix salt and oil into the yeast. Mix in flour one cup at a time. Knead dough on a lightly floured surface until smooth. Place in a well oiled bowl, and turn dough to coat. Cover with a damp cloth. Allow to rise until doubled in bulk, about 1 hour.

Punch dough down. Knead for a few minutes, and divide in half. Shape into loaves, and place into two well oiled 9x5 inch loaf pans.

Allow to rise for 30 minutes, or until dough has risen 1 inch above pans. Bake at 350 degrees F (175 degrees C) for 30 minutes.


Sunday, November 18, 2007

Just Sweet

I was in the mood for some sugar cookies.
You know the kind that are nice and chewy (yet crisp) and are slathered with frosting!

While these are no where near the best sugar cookies I have eaten (moment of silence for G's bakery which closed after G died last year and sadly took my beloved Froting topped chewy yet crisp sugar cookie with him). However, this recipe is one of the best I have baked.
I got the recipe from a wonderful cook/baker who posted this recipe on a cooking board I frequent (Shout out to WC Sistas!!). She got it from a coworker of hers and has been kind enough to pass it along to others! My sweet tooth thanks you Joelen! The dough does need to be chilled overnight for the easier rolling of the dough (but feel free to taste test it before chilling!)Oh, and don't substitute butter for the margarine, the margarine is needed for the cookies to maintain their texture and chewiness. Butter will produce a crisper cookie so if that is what you are after, go for it, heck, they are YOUR cookies after all.


Jon's Super Sugar Cookies
from nestie Joelen
*Check out her blog: http://joelens.blogspot.com/
2 eggs
3/4 cup margarine
1 cup white sugar
1 teaspoon real vanilla
1 teaspoon baking powder
1 teaspoon salt
2 1/2 cups AP flour
frosting - recipe follows

Cream margarine and sugar well. Add vanilla and eggs; combine well.
In separate bowl, sift the baking powder, salt and flour. Add to wet ingredients slowly until thoroughly combined.
**Cookie dough must be chilled until firm, or overnight.
Remove dough from fridge and roll out to a 1/4 inch thickness.

Preheat oven to 400 degrees
With cookie cutters or rim of drinking glass, cut out cookies. Place cookies on an ungreased cookie sheet and bake in preheated oven for 8-10 minutes, depending on oven. Check often to prevent over cooking or burning. Cool on baking rack when done.

Meanwhile, to prepare frosting - its a MUST for these cookies! (go all the way or not at all- lol)
FROSTING
1 teaspoon real vanilla
1 stick of real butter
4 cups powdered sugar
1 tablespoon cream or whole milk
Cream butter, milk and vanilla together.
Slowly add powdered sugar to butter until desired consistency. If you'd like, add liquid food coloring for festive cookies.

When cookies are cooled, slather this heavenly frosting. For more texture and color, press the top of the cookies in sprinkles, colored sugar or just eat plain!


Sweet and Spicy

Oh, yes, the adjectives often used to describe me also describe one of my favorite holiday cookies.

Ginger Cookies are a must have in my house around the holiday. NOT the thin little snap type (while I do like those with pumpkin dip) I need a cookie to sink my teeth into and these cookies fit the bill.


I love how the ginger/cloves/cinnamon balance out the delicate sugar "crust" on these cookies. These cookies are so easy to whip up and make your house smell wonderful while they are baking. I will admit, I have not tried any other ginger cookies but don't feel the need to. The texture of these cookies is dense yet chewy and because they are rolled in sugar, the outside has nice crispness to them. These are not thin like a snap, but rather a nice hearty cookie that packs a mouthful of flavor. These are made with shortening, I am not sure they would retain their great texture if you used butter, but it is worth a shot if you insist on avoiding shortening.

Ginger Cookies
from Better Homes and Gardens
4 1/2 cups flour
4 tsps ground ginger
2 tsp baking soda
1/4 tsp salt
1 1/2 tsp ground cinnamon
1 tsp ground cloves
1 1/2 cups shortening (I used butter flavor transfat free Crisco)
2 cups sugar
2 eggs
1/2 cup Molasses (NOT Blackstrap)
3/4 cup sugar for rolling


Preheat oven to 350.
In large mixing bowl wisk flour, baking soda, ginger, salt, cinnamon and cloves. Set aside.

In mixing bowl beat shortening for 30 seconds. Add sugar and beat until well combined. Beat in eggs and molasses until combined, scraping sides of bowl as needed. Add as much of the flour mixture as your mixer can handle and fold in the rest by hand.
Shape dough into 2 inch balls and roll into 3/4 cup sugar just to coat. Place on baking sheet at least 2 inches apart. Press down slightly on dough balls so they evenly bake and spread out.

Bake for 10-12 minutes or until bottoms are LIGHLTY brown and tops are puffed. Do NOT overbake. Cook on cookie sheet for 2 minutes and finish cooling on wire rack.

**I made mine smaller using my medium size scooper from Pampered Chef and baked for about 7-8 minutes.


Sunday, October 28, 2007

For the Love

of chocolate and cheesecake!

These brownies are awesome! So rich and chocolatey paired with the creaminess of cheesecake swirled throughout! So simple yet so impressive and decadant. You really should use a good quality cocoa powder to fully appreciate these brownies. I used the recipe for the brownie from the Ghriadelli Sweet Cocoa Can.

Ghirardelli Award Winning Brownies
2 eggs
3/4 cup sugar
1 tsp pure vanilla
1/2 cup butter, melted
3/4 cup Ghirardelli Sweet Ground Chocolate and Cocoa
2/3 cup unsifted flour
1/4 tsp baking powder
1/4 tsp salt
1/2 cup walnuts (I did not use)
1 cup Chocolate Chips (I used 1/2 semi sweet and 1/2 milk chocolate chips)

Preheat oven to 350.
Line 8x8 pan with foil and spray with PAM.
In bowl, stir together the eggs, sugar and vanilla. Add butter.
Sift Cocoa powder, flour, baking powder and salt. Stir into egg mixture.
Stir in chips (and nuts if using).

**Spread into pan and bake for 20-30 minutes until toothpick inserted in center comes out with a few crumbs.

Cheesecake Swirled Brownies

**If making cheesecake swirled brownies, use recipe above but only spread 2/3 batter into pan. Dollup cream cheese mixture over brownie batter in pan.
Dollup the remainin 1/3 batter on top of cheesecake mixture.
Run a knife through the brownie and cheesecake layers to create a pattern or swirls.
Bake in preheated oven for 25 minutes or until toothpick comes out with a few crumbs when inserted. Do NOT overbake

Cheesecake Swirl
7 oz cream cheese, softened
1/3 cup sugar
2 TBS flour
1 tsp pure Vanilla
1 egg

In bowl combine cream cheese, sugar, flour and vanilla beat until smooth. Add egg and beat just until combined.

The BEST Chewy Chocolate Chip Cookies Ever!

Make these cookies. Eat these cookies. Fall in love with these cookies.

These cookies totally speak for themselves. There are other recipes that try and claim to be the best but let me tell you that they all fall short of being the best. This recipe, however is the best in my opinion. The cookie dough is easy to work with and produces a soft (not cakey) chocolate chip cookie that will knock your socks off. I love to use a mixture of semi-sweet and milk chocolate chips for a little extra sweetness (not that these cookies need it, I do!)

I am not alone believing this recipe is the best, in fact, I am copying the recipe as Katie has posted it on her blog. Check it out she has some great recipes http://goodthingscatered.blogspot.com/2007/08/best-chocolate-chip-cookies.html
So make these cookies or you will never know just how good a chocolate chip cookie can be. Grab a big glass of milk and enjoy!
Thick and Chewy Chocolate Chip Cookies
adapted from America's Test Kitchen

2 cups plus 2 Tbsp all-purpose flour
1/2 tsp baking soda
1/2 tsp salt
12 Tbsp (1 1/2 sticks) unsalted butter, melted & cooled until warm
1 cup brown sugar, packed
1/2 cup granulated sugar
1 large egg plus 1 yolk
2 tsp vanilla extract
1 1/2 cups semisweet chocolate chips
Adjust oven racks to upper & lower -middle positions & heat oven to 325.
Line cookie sheets with parchment paper.

Whisk dry ingredients together; set aside.With electric mixer, or by hand, mix butter & sugars until thoroughly combined.
Beat in egg, yolk and vanilla until combined. Add dry ingredients & beat at low speed just until combined. Stir in chips.

Roll scant 1/2 cup dough into ball. Holding dough ball in fingertips of both hands, pull into 2 equal halves. Rotate halves 90 degrees and, with jagged surfaces facing up, place formed dough onto cookie sheet, leaving ample room between each ball.-Bake, reversing position of cookie sheets halfway through baking, until cookies are light golden brown and outer edges start to harden yet centers are still soft & puffy. *This took about 14 minutes in MY oven but start at 10 minutes and check from there. Do NOT overbake!

Cool cookies on sheets until able to lift without breaking and place on wire rack to cool.

Tuesday, October 16, 2007

The Way Nature Intended

Peanut Butter, that is.
This is my first time using all natural PB, (I usually by Jif or Skippy) but the last time I was at store I decided to give "All Natural" a whirl.
My friend has raved about this recipe for months now, insisting that I just HAD to try it.

She ONLY buys "All Natural" products and insisted that this recipe is not as good with any other peanut butter because of the chemicals in them (chemicals schmemicals, I love my Jif and Skippy and its lab created flavor. Plus the stuff has an incredibly long shelf life, not that I have personal experience with an open jar lasting long enough around here to be sure).

This is my first time using this recipe so I do not know how they would turn out with using your regular old tub of Peanut Butter. In my opinion, anything with Peanut Butter is pretty darn good, so I will definately have to try out my good old Jif (in the name of science of course!)

I have not taste tested one yet because they are for work tommorow, but I can NOT wait to sink my teeth into one of these babies.

Naturally Nutty Peanut Butter Cookies


1 3/4 cups plus 2 TBS flour
1 tsp baking soda
1/2 teaspoon salt
1 1/2 cups natural creamy peanut butter, (make sure to stir it to combine the oil and solid mixture)
2/3 cup sugar
2/3 cup brown sugar
4 TBS unsalted butter, room temperature (NOT too soft)
2 eggs
2 TBS light Karo corn syrup
1 TBS vanilla extract

Preheat the oven to 350.
In a medium mixing bowl combine flour, baking soda and salt. Set aside.
In a medium mixing bowl blend together the peanut butter, sugar, brown sugar, and butter on low speed until JUST combined, making sure not to over mix. With the mixer turned off, add the eggs, corn syrup and vanilla extract and beat on low until JUST combined.

Slowly add the flour mixture until just combined. Stop mixer before the flour is completely incorporated to prevent over mixing and finish by hand.The dough should a little sticky.

Using the Pampered Chef Medium size scoop, shape the cookie dough into balls Place formed dough balls on parchment lined cookie sheets. With the tines of fork dipped in sugar, lightly press and flatten each ball making a crisscross pattern.

Bake cookies 9-11 minutes until they are JUST SET and start to show a tiny amount of light brown color on the edges. Cool the cookies in the pan for a minute. Then, transfer to wire rack to cool completely.

Monday, October 15, 2007

Cooking for One

Gone Fishin

Tonight I was on my own for dinner. I was in the mood for fish but after reading throush several recipes decided I would wing it. I had some frozen Mahi Mahi so I thawed that and decided to raid my pantry.

This meal was so quick (less than 15 minutes start to finish), super healthy (low carb and lovin it!) and so flavorful (can we say Red Pepper Flakes???). I would definately make this again! I did not use exact measurements but here it the jist of what I did:

Seared Mahi Mahi with a Southwest Flare
3 oz. Mahi Mahi
1/2 cup black beans (rinsed and drained)
1/2 cup canned diced tomatoes
1/4 cup chopped yellow onion
2 cloves garlic minced
Cumin (to taste)
Chili Powder (to taste)
Dash (or 3-4 if you are me!) of Crushed Red Pepper Flakes
Salt (to taste)
Fresh ground pepper (to taste)
1/2 tsp Lime juice (I used bottled)
EVOO spray

Heat a skillet over medium high heat. Spray with EVOO spray. Wash fish and pat dry. Season with salt, pepper and cumin. Sear fish in hot pan on one side. Do not move fish for 45-60 seconds to ensure a nice searing. Flip and sear the other side for 30-45 seconds. Remove fish from pan and place on plate.

Reduce heat to medium and spray pan with a little more EVOO spray (may want to turn vent on because it may smoke, ha ha). Add onion and cook for 30 seconds stirring frequently. Add garlic, tomatoes and black beans. Season with cumin and chili powder (I used about 1/3 tsp cumin and 1/4 tsp chili powder, use less if you don't want the heat). Add a dash or two of crushed red pepper flakes (more or less depending on how hot you want it, I was liberal, ha ha)
Cover and let simmer for 45-60 seconds or until onions become transluscent.

Stir and season to taste (I added more cumin). I added 1/8 cup water because the mixture was a little thick. Return fish to pan, cover and simmer until fish is heated through and liquid has reduced to desired consistency (about 45-60 seconds).

Remove fish to plate, stir in lime juice and stir. Season to taste and plate tomato/bean mixture with fish.

*Next time I will add 1/2 cup frozen corn when I add the tomatoes and beans and garnish with fresh chopped cilantro when adding the lime juice.

This would pair nicely with Mexican or Brown rice!

Sunday, October 7, 2007

Butter Me Up!!

These cookies remind me of something Paula Dean would make (1 1/2 cups of butter!!!) Yowza! Also, these cookies use few ingredients (NO eggs needed!) and are a snap to whip up! The finished product is light and butter and slightly sweet. The texture of these cookies is not cake-like but somewhat "flakey". They definately melt in your mouth! I think the mini-chips are perfect in this recipe (or omit all together). Regular size chips would overpower this little gem and I am not sure the cookie has the sturdiness to handle full size chocolate chips without crumbling. Plus, the minis are soooo cute!

These would be so cute on a Christmas goodie platter sprinkled with powdered sugar or green/red granualted sugar!

Mini Chocolate Chip Butter Cookies
1 1/2 cups butter, softened
3/4 cup powdered sugar (sifted, after measuring)
1 TBS vanilla
3 cups flour
1/4 tsp salt
1 1/2 cups Mini chocolate chips (I used Semi-sweet, but Milk-chocolate would be good also)
1/2 cup finely chopped walnuts (I did not use)
Powdered Sugar or Sugar for garnish

Preheat oven to 375.

In a mixing bowl, beat the butter until smooth. Add sugar and vanilla and beat until creamy. Mix in the flour and salt until combined. Gently fold in the chocolate chips and nuts by hand just until combined.Form dough into balls using medium scoop and place on parchement lined baking sheets.

(At this point I chilled and then transferred to tupperware containers to freeze once the balls had set. ) *I would recommend chilling balls for a few minutes before baking to prevent overspreading.

Bake on parchment lined baking sheets for 9-12 minutes or until lightly browned. Sift powdered sugar over cookies directly out of oven or sprinkle with colored sugar. Cool on baking sheet for 5 minutes and then transfer to a cooling rack to cool completely. Before serving, sprinkle with additional sugars if desired.

Can you have Too much Chocolate?

I think NOT! These cookies are soooo chocolatey and will satisfy any Chocoholic's craving! Be sure to read the directions, you combine the baking soda with the wet ingredients, not the dry like many other cookie recipes.

Because they are a dark cookie, it is hard to tell when you should take them out of the oven, I like to err on the side of caution and remove a bit early. In my opinion a gooey cookie is better than a dry one ANY day!! These pair nicely with vanilla icecream and hot fudge!!

Triple Chocolate Chocolate Cookies
2 sticks butter
3/4 cup sugar
3/4 cup brown sugar
1 tsp baking soda
2 tsp Vanilla
2 large eggs
3 oz. Unsweetened Chocolate, melt and then cool
2 cups Flour
1/4 cup bittersweet chocolate chunk
1/2 cup white chocolatechunks
1 cup semi-sweet chocolate chunks (milk chocolate would be great!)
1/2 cup chopped nuts (walnuts, pecans, macadamia) optional
Preheat oven to 350.

Melt 30z chocolate in 15 second intervals in microwave safe bowl, stirring after each interval.
Heat until able to stir smooth, Do NOT overheat or it will seize and taste burnt. Set aside to cool.
In a mixing bowl, beat the butter, sugars and baking soda until combined. Add the vanilla and eggs and beat until mixed well. Fold in the cooled melted chocolate until combine.

Slowly beat in the flour and mix until just combined. Fold in the chocolate chunks and nuts. Form dough into balls using medium scoop and place on parchement lined baking sheets.
(At this point I chilled and then transferred to tupperware containers to freeze once the balls had set. ) *I would recommend chilling balls for a few minutes before baking to prevent overspreading.

Bake on parchment lined baking sheet for 10-14 minutes or until edges are firm to the touch.

Cool on baking sheet for 2 minutes and then transfer to cooling rack to cool completely.

Sometimes you feel like a Nut

I love to bake, as you may have guessed by my blogname! On Friday I whipped up a few batches of cookie dough, formed into balls using my Pampered Chef medium sized icecream scoop (LOVE IT, if you don't have one, you need to buy this item), chilled and stored in tupperware in the freezer so I can bake them up at my leisure.

This first batch combines several of my favorite ingredients in baked goods: nuts, chocolate and coconut. The higher ratio of brown to white sugar ensures these cookies (if not overbaked) stay slightly chewy even after cooling. They bake up rather thin and not puffy, but I prefer them that way. The brown sugar also provides the finished cookie a slight "toffee" taste similar to that of my beloved Basic Blondies. While the nuts are optional, I would highly recommend adding them, substituting your favorite nut in place of the walnuts is fine, but the nuts really do play off of the "toffee" taste of these cookies nicely!


Coconut Nut Chipsters
1 1/2 sticks butter, softened
3/4 cup brown sugar
1/4 cup sugar
1 1/2 tsp Vanilla
1 egg
1 2/3 cup flour
1/2 tsp baking soda
1 tsp baking powder
1/4 tsp salt
1 cup Milk Chocolate Chips (could sub semi-sweet if desired)
1/2 cup White Chocolate Chips (could sub a different flavor chip or use all chocolate)
1 1/3 cup Coconut (lightly toasting is optional)
1 cup Walnut pieces (or other fave nut)

Preheat oven to 375.

In a large bowl, combine the flour, baking soda, baking powder and salt. Whisk to combine. Set aside.

In a large mixing bowl, cream the butter, sugars and vanilla until light and creamy. Beat in egg. Slowly add flour mixture and mix just until combined. Gently fold in chips, coconut and nuts by hand just until combined.
Form dough into balls using medium scoop and place on parchement lined baking sheets.

(At this point I chilled and then transferred to tupperware containers to freeze once the balls had set. ) *I would recommend chilling balls for a few minutes before baking to prevent overspreading.

Bake for 8-12 minutes or until lightly browned. Cool on sheets for 2 minutes and transfer to cooling rack to cool completely.

*Next time I might substitute butterscotch chips for the white chocolate chips, I think the butterscotch and nuts will be awesome with the brown sugar flavor of theese cookies!

Tuesday, September 4, 2007

I prefer Hide and Go Seek

But, alas I have been tagged by Brooke (http://brooke-cookiejar.blogspot.com/). So I will play along! I do love a good game now and again!
I need to share with you all eight fun facts about myself and then tag eight more people to do the same.

1) I have absolutely NO willpower or control over my consumption of Cereal. The only psuedo control I possess is to not purchase it and therefore making it much more difficult to consume it. I have been known to beg, borrow and steal it from neighbors and roommates in college! It does not matter the kind, I love it all. From Grapenuts (those little buggers multiply in milk) to Fruity Pebbles. From Raisin Bran to Apple Jacks. From Fiber One to Lucky Charms. I think you get the picture. I will eat the entire box in one sitting without even realizing it! I will eat it until the entire box is either empty or physically removed from my presence. I am so weak.

2) I love the tv show Big Love on HBO. I don't have the HBO package so I rent them from Blockbuster and have just finished season One. I can NOT wait for season Two to come out on DVD so I can once again settle into my weekend routine of popping some popcorn and settling in to watch a few good episodes. I never get sick of seeing what Nicky will buy next or Margene's next "Young Life Crisis" breakdown. Trully my fave show right now. Highly recommended.

3) I have never baked a yeast bread. I have made several loaves of quick bread and have purchased and baked many a frozen loaf of bread, but have not ever prepared the dough from scratch. It is on my "Must Do" list for the fall and winter months.

4) I have never been late a day in my life. I HATE people who are perpetually late and think their time is more important than yours. I especially hated those people in college and the professors who would wait to begin knowing some students would be coming in late. HELLLLLLLOOOOOOOOO 99% of us are here and ready to begin, I say let us leave 10 minutes early and keep those who choose to be late, stay late to get the full information from class! This only irritates more the older I get. I mean come on people, either get a watch, or check the phone: your cellphone has the time right on it you have NO excuse for always being 5-10 minutes late! UGHHHHH

5) I love all vegetables and would much rather give up all meat, fish and poultry than to give up my veggies!!

6) I really love celebrity gossip. I get excited reading and hearing about recent break-ups/hook-ups, meltdowns and weight gains/losses. I know it only perpetuates what is the trainwrecks knows as "Celebrities" but I can't help it! Maybe I should join a 12 Step program or something.

7) I idolize my mother. She does not know this and I do not tell her often enough how great she is not only as my mother, but as a human being with whom I have had the pleasure to walk this earth with.

8) I would love to join Global Volunteers and spend a week or two in Africa digging wells, teaching English to children and building houses. Time and life keep getting in the way and I make way too many excuses for not going. One day (hopefully soon) I will run out of excuses and take the plunge.

Sinless Chocolate? That is Heavenly!

So, I am never one to shy away from full fat/full calorie baked goods. I mean, come on, all that butter and sugar is what MAKES many desserts taste so darn good! Well, these little devils have sugar but are butterless and let me tell you, they deserve a place at the top of the dessert chain right along my Death by Chocolate Brownies (pic and recipe yet to be blogged about) and my Basic Blondies! I first saw this recipe a while back on a website for Weight Watcher users (I am not on WW but like to lurk around different boards). This recipe reappeared on TheNest's cooking board and I knew I had to make them. These cookies are so chocolatey, so rich and so sweet that you will swear you have died and gone to heaven. The best part is, these have all the flavor and texture as butter hoarding baked rivals but are much lower in fat, making them a fairly "sinless" dessert when looking at the alternative baked goods. I wouldn't call these a health food but I would call these little devils DELISH! Especially with a scoop of FroYo sandwiched between two of them.


Sinless Chocolate Chews
2 1/4 cups powdered sugar
1/4 teaspoon salt
1 teaspoon espresso powder
1 cup cocoa powder, (I used Ghiradeli unsweetened)
3 large egg whites
2 teaspoons vanilla extract


In a large bowl, whisk together the sugar, salt, espresso powder, and cocoa. Set aside.
In a medium-sized mixing bowl, stir together the egg whites and vanilla with a fork.

Slowly add the dry ingredients to the egg whites, and mix either by hand with a spatula or at low speed with a mixer for 2 minutes.

The batter will seem dry at first, but will become shiny and smooth as it mixes.
Cover the bowl, and refrigerate the batter for 3 hours, or up to overnight.

Preheat the oven to 350°F. Line a cookie sheet with parchement paper (or these babies will stick!) Drop the dough by balls onto the prepared baking sheets using a medium icecream scoop (like from pampered chef)

Bake the cookies for 10-11 minutes or until set around the edges.
Remove them from the oven, and cool on the pan for 5 minutes before transferring them to a rack to cool completely.


Thursday, August 23, 2007

My Namesake

White Chocolate Toffee Pecan Blondies

Here it is, the end all and be all of Blondies. I am a sefl proclaimed Chocoholic and this recipe rivals any brownie recipe I have made or tasted.

This recipe rocks not only because of its flavor, but also because its base uses ingredients almost everyone has on hand at all times (egg, flour, butter etc).


It is so simple to whip up because the butter is melted, you do not need to wait for it to come to room temp making these the perfect last minute dessert. Plus the recipe is super versatile; you can stir in any addition you can think of to suit your tastes making them a totally different treat each time you bake! This one recipe will literally give you a thousand different dessert options by mixing up what you use for "add ins". I have not come across a bad combination of "add ins" yet and I have made these a hundred times or more. I dare you to see if Blondes really do have more fun.

*For the blondies pictured I used 1/2 cup white chocolate chunks, 1/4 cup toffee pieces and 1/2 cup toasted Pecan pieces.

Basic Blondies
6-7 TBS butter, melted
1 cup brown sugar
1 egg
1 tsp. vanilla extract
1/4 tsp salt
1 cup flour
1/4 tsp baking powder (optional, creates lighter blondie texture)

"Add in" (see below)

Preheat oven to 350.
Line an 8x8 pan with foil and lightly spray with PAM.
In a large microwave safe mixing bowl melt the butter. Allow to cool for 5 mintues. Mix the brown sugar with the melted butter and beat until smooth. Beat in egg and then vanilla. Add salt, stir in flour and baking powder (if using). Mix in any additions (some ideas below).

Pour into prepared pan and use a greased spatula to evenly spread mixture in pan and level the top. Bake for 20-25 minutes or until set in the middle. (I baked for 22 minutes)Cool on rack before cutting.

Add in ideas:
1/2 to 1 cup chocolate chips, peanut butter chips, white chocolate or butterscotch chips
1/2 cup chopped pecans, walnuts, almonds
1/2 cup M&M candies1/2 chopped Reese's PB cups
1/4 cup toffee pieces
1/2 tsp mint extract in addition to, or in the place of vanilla extract

Crack is Whack


Ok, this is MY crack! I love this snack mix and have eaten myself sick off of it because I have NO self control. This is a recipe I made up to take to a family reunion based on what I had on hand about two months ago.Needless to say everyone loved it and I have made it about six times since then and shamefully admit have eaten the majority of during my late night cravings for something sweet and a tad salty. The recipe can be easily halved as well for those with little will power like me, but trust me, you will just be making another batch that much sooner!
This mix is very sweet indeed and is not for those who do not appreciate the wonderful goodness that is anything coated in a carmel/toffee type mixture. The snack mix bakes up golden and the carmel coating hardens forming the perfect coating on the nuts and cereal. The dash of salt and the salt from the nuts compliment the sweetness of the coating beautifully. While the toasting of the pecans and almonds is optional, I would highly recommend it. Toasting the nuts brings out a totally different and deeper flavor that adds a whole new dimension to any recipe you add them to.
No true snack mix (in my opinion) is complete without some chocolate and M&M's fill this requirement! I may try adding pretzel sticks to the cereal/nut mixture before baking next time and maybe tossing in some Reese's pieces or chopped Reese's Peanut Butter cups with the M&M's next time. Peanut Butter M&M's would be great as well. Heck, the possibilities are endless, mix and match to suit your tastes.
Carmel Nut Snack Mix
12 cups Crispex Cereal (Chex would work as well)
3/4 cup light corn syrup (Karo is my fave)
1 stick of butter
1 cup packed brown sugar
Dash of salt
3/4 cup chopped pecans, toasted
3/4 cup almonds, toasted
3/4 cup honey roasted peanuts
1 cup M&M candies (I used plain and peanut)

Preheat oven to 250.
Line a very large roasting pan (or two rimmed cookie sheets) with quick release foil and lightly spray with PAM.
In a medium size sauce pan over low/medium low heat, stir together the syrup, butter and brown sugar. Stir constantly until melted and sugar has disolved.
Place the cereal, pecans, almonds and honey roasted nuts into the prepared roasting pan or cookie sheets. Carefully pour the brown sugar mixture over the cereal and nuts. Use a butter spatula to toss and coat the cereal and nuts completely with the brown sugar mixture.
Evenly sprinkle lightly with salt.
Bake for 45 minutes removing every 10 mintues to gently toss with a buttered pair of tongs to ensure even baking/browning.
While snack mix is baking, spread a few large sheets of parchment paper on counter. After mixture has finished baking add the M&M candies and stir to combine. Turn mixture out onto parchment making sure to spread out to prevent large clumps to cool.
While mixture is cooling, gently toss every 15 minutes to prevent further clumping together, breaking up clumps as needed. Store in airtight container.

Bow Wow for Puppy Chow


If dogs eat this good I wanna be a Poodle in my next life!

Now we all know that this recipe isn't really for dogs as they are not to have chocolate. I am not sure where the title of this addictive treat comes from, but it is known as "Puppy Chow" in my family. (I have heard others call it "White Trash Mix" as well). Whatever you choose to call it, the fact remains, this quick and easy snack is addictively DELISH!

I love cereal and any recipe that involves Peanut Butter, Chocolate and Cereal has to be a winner in my book. Nothing is better than licking the white sugary goodness off of your fingertips after you are finished enjoying this addictive treat.

The recipe can be easily halved and keeps for days (if it lasts that long) in an airtight container kept at room temp or in the fridge during these hot months.


Puppy Chow
9 cups Crispex Cereal (Chex would work as well)
2/3 cup Creamy Peanut Butter
4 TBS butter
1 1/4 cups semisweet chocolate chips
1 teaspoon vanilla
1 1/2 cups powdered sugar

Into large mixing bowl, measure the cereal and set aside. In medium saucepan, combine the peanut butter, butter and chocolate chips. Heat over low heat stiring frequently until all of the mixtuere is melted and creamy. Remove from heat and stir in vanilla. Evenly pour mixture over cereal and toss to coat completely. In a huge ziplock bag place half of the powdered sugar mixture. Toss half of the chocolate covered cereal to the bag and shake to coat. Spread coated cereal on waxed paper covered baking sheet or counter. Repeat with remaining sugar and cereal. Once mixture has cooled, store in tupperware container in fridge to keep fresh.


Monday, August 20, 2007

Christmas in August (at least in MY kitchen)

Wow, August is almost over, I can NOT believe it! Pretty soon Christmas will be right around the corner.

Well, this weekend I baked up a tasty little cookie that reminds me of the Christmas cookies my mom always bakes. I didn't take a picture but let me tell you these need to go in your holiday rotation! They are chocolatey, pepperminty, and oh so sweet (even if you have not been).

The real key here is a good quality cocoa powder. I LOVE Ghiradelli chocolate. I like Hershey's cocoa as much as the next gal (HELLO Perfectly Chocolate Cake and Frosting) but these cookies really deserve some high quality cocoa.

These cookies are sweet (may be too sweet for some: (cough, chickens!! cough)) so rolling them in sugar before baking is optional. However, doing so will produce the most glorious sugar crusted, crackly topped chocolate peppermint piece of heaven you have ever had the pleasure to indulge in.

*Can be easily doubled, I got about 14 cookies, just enough to eat some a freeze some.
Chocolate Peppermint Cookies
1/4 cup butter, softened
1/4 cup butter flavor Crisco
3/4 cups + 2 TBS sugar
1 egg, room temp
1/2 tsp peppermint extract (not oil)
3/4 cup flour
1/2 cup unsweetened Ghiradelli cocoa powder
1/2 teaspoon baking soda
1/4 teaspoon baking powder
1/4 teaspoon salt
1/2 cup White chocolate chips
1/2 cup Andes Peppermint chips (the white and red ones) (NOT the regular green/chocolate Ande's mints!!)
Sugar (for rolling dough balls)

Preheat oven to 350.Line baking sheet with Parchement paper.
In medium bowl whisk together the flour, cocoa powder, soda, baking powder and salt. Set asideCream the butter and Crisco. Add the sugar and beat until blended. Add egg and peppermint extract, beat until well combined.

Fold in with a spatula the flour/cocoa mixture. Mix with a blender 10 seconds to combine. Fold in the white chocolate chips and Andes chips. Using a medium cookie scoop form dough into 1-inch balls. Roll each dough ball in a cup of sugar to lightly coat. Place 2 inches apart on prepared baking sheets.

Bake for 9-10 minutes or until edges are firm and the center appears slighlty soft, don't overbake. Cool on baking sheet 3-5 minutes. Transfer cookies to racks and cool completely.

Say CHEESE!!!!!!!!!!!!!!!!!!!!!!!


Cake!

Cheesecake, Oh Cheesecake. How I love thee.
I made this about a month ago, took a picture (NO cracks!!!!) and never had anywhere to post it! So, with out further ado, here is my PERFECT cheesecake. She is a glorious combination of three recipes and let me tell you she was so rich, creamy and quite possibly the best tasting dessert my mouth has ever had the pleasure to enjoy. I kept it simple so I could top with whatever my heart and tummy fancied at the time. Let me tell you, she tasted just as good topped with fresh fruit as she did douced in hot fudge, caramel and nuts! I don't have the recipe written down, but I promise the next time I make this glorious marvel I will take another picture and post the recipe.

A Woman's Work is NEVER Done: More Chocolate Chip 'Cookies


Here is a recipe I have been wanting to try forever and this past weekend I finally did. It comes from Sarah Phillips' book Baking 411. She promises a cookie with a crunchy outside and a chewy inside that is not cakelike. These cookies deliver. They taste like how the Nestle Tollhouse cookies should taste (if the recipe can be prepared correctly). That is the great thing about these cookies, you don't need special flour (like Alton's) or to chill the dough. The addition of baking powder is what gives these cookies their slight lift and soft chew without becoming cake-like. Just whip them up and bake them and you won't be sorry!
Bonus: I froze several of these, and even out of the freezer they are slightly "chewy" and not rock hard!

Here is her recipe for:
Thick with a Chew Chocolate Chip Cookies

2 2/3 cups unbleached all-purpose flour (spoon into meauring cup and level to top rim)

1/2 teaspoon baking powder

1/2 easpoon baking soda

1/2 teaspoon salt

3/4 cup sugar

3/4 cup packed dark brown sugar

2 sticks (1 cup) unsalted butter (can be cold from refrigerator - cut each stick into tablespoon size pieces if cold)

2 large eggs, can be cold from refrigerator

2 teaspoons vanilla extract

2 cups semisweet chocolate chips

1 cup chopped walnuts, optional (chop, then measure)

DIRECTIONS:

Position the oven rack in the middle of the oven.

Heat oven to 375.

Combine flour, baking powder, baking soda, and salt in a medium bowl; set aside.

If the butter is cold, in a large bowl, beat the butter until just softened with a handheld mixer on low speed. Add the sugars and cream on low until well combined.

If the butter is at room temperature or somewhat soft, combine it with the sugars in the mixing bowl and cream together. If you cream the mixture just right, it will look somewhat creamy and a little shaggy.

Do not overcream it to the point that it is really creamy and the butter starts to feel greasy. If you do, place the mixing bowl in the refrigerator for 20 minutes or until the fat hardens.

With the mixer still on low, add the eggs and vanilla and mix until incorporated.With a large rubber spatula, fold in the flour mixture. The dough will be stiff. Beat on low for 5 to 10 seconds to combine.

Fold in the chocolate chips and walnuts.Roll one tablespoon of the dough into a ball for each cookie, and place the balls about 1 inch apart on an ungreased baking sheet.

The dough will spread very little when baked. Bake for 7 to 10 minutes (about 5 minutes for smaller cookies) until just browned around the edges, and pale and slightly unset in the middle. Let the cookies cool on the sheet for 1 minute. Then remove the cookies from the sheet to wire racks to cool completely.
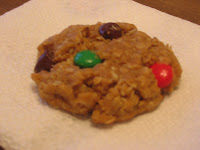
Taste Testing: Chocolate Chip Cookies

I LOVE to bake, so when a friend passed along a new recipe for the classic Chocolate Chip Cookie, I had to give it a whirl. These cookies bake up with a slightly crisp exterier and a moist crumb interior. This is not the cookie for those who like nice and soft puffy cookies. However, these cookies are nice and sturdy and after chilling in the freezer for 30 minutes and are perfect with a big ol'scoop of icecream sandwhiched in between two of them! These would travel well and can be easily stacked for shipping as well.

I was a bit surprised by the end result of the cookies. The recipe uses shortening, which I thought would produce a puffy cookie, but I was wrong, yet not disappointed with the results. The flavor of these is just the right combination of chocolate and vanilla. What makes these cookies stand apart from my usual recipes is the use of Milk Chocolate chips (a welcomed change) but SemiSweet chips can be easily subbed. Although I would suggest giving the Milk Chocolate chips a whirl, they are under-utilized in cookie recipes in my opinoin.

Milk Chocolate Chippers
1 cup butter Flavor Crisco
3/4 cup sugar
3/4 cup brown sugar
2 eggs
1/2 tsp water
1 tsp pure vanilla extract
1 tsp salt
1 tsp baking soda
2 1/2 cups flour
2 cups Milk Chocolate Chips

Preheat oven to 350.
In a large bowl whisk the flour, salt and soda. Set aside.
Cream shortening and sugars until blended. Add eggs and vanilla and mix to combine.
Fold in the flour mixture just until combined.
Fold in the chips.
Bake on parchement lined baking sheets for 8-10 minutes or until edges are light brown. Do not overbake. Cool on sheet for 3 minutes and transfer to rack to cool completely.