Saturday, December 29, 2007

My Favorite Cookie

EVER!!
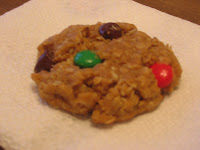
Monster Cookies!
I am a lover of cookies. I love trying new recipes, but this one I crave more than all the others. I love the combination of Peanut butter and Oatmeal. I am not sure why they are called Monster Cookies, that is what my mom always called them.
I love this recipe for looks, texture and definately taste!

This recipe is so versitile and you can really make it your own (just like the Basic Blondies)! The peanut butter taste is not overwhelming but provides a subtle backround flavor that pairs nicely with whatever you choose to stir into this recipe. The oatmeal provides a great texture without being too grainy as some can be. These are enjoyed by adults and kids alike!

Monster Cookies
½ cup butter, room temp
1 1/4 cup brown sugar
3/4 cup sugar
3 eggs
1/8 cup vanilla extract
1 1/2 cups peanut butter (I like Creamy)
1 tsp baking soda
4 ½ cups oatmeal (quick cooking or old fashioned)
Add-ins should equal 1 -2 cups total:
(I used 1/2 cup chocolate chips and 3/4 cup Reese's Pieces Holiday Edition)
chocolate chips
white chocolate chips
butterscotch chips
PB chips
M&M's
Reese's Pieces
Nuts (walnuts, peanuts, pecans)
Raisins
Craisins
Preheat oven to 350.
In mixing bowl, combine butter and sugars until blended. Add eggs and vanilla. Beat until combined.
Add Peanut Butter and baking soda. Beat until combined.
Slowly add oatmeal. Blend in as much as you can with mixer and fold in the rest by hand along with your choice of Add-ins.
Drop on parchment lined baking sheets and bake for 8-10 minutes until light brown and just set around edges. Cool on counter. Store in tupperware with slice of bread (not touching cookies) to keep soft and chewy for a few days.

Pour some Sugar on Me

Sugar Cookies!!!
I found a keeper! I have only baked these once, but trust me, they WILL be made again sooner than later!
I am a lover of all sweets at the holidays as my tight fitting clothing this week proves. I have always loved my mom's crisp sugar cookies with a gentle sprinkling of sugar, I still do.

But every now and then I am in the mood for a nice thick and chewy sugar cookie topped with frosting. I have tried many recipes but these fit that bill! The dough was sooo easy to work with and did not require chilling before rolling (time saver!). These cookies are soft and have an amazing butter flavor lacking in many sugar cookies in my opinion. I know the Holidays are over, but do yourself (not your waistline) a favor and bake up a batch of these today. Use a non-holiday cookie cutter and these can be enjoyed year round! Yeah!!
Famous Sugar Cookies
1 cup butter (VERY soft)
1 cup sugar
1 large egg
1 tsp vanilla extract
2 3/4 cups flour
2 tsp baking powder

Preheat oven to 375.

In a small bowl stir together the flour and baking powder. Set aside.
In mixing bowl beat butter until soft and smooth. Add in sugar and beat to combine. Add egg and vanilla and beat until just combined. Add flour mixture. Beat until just combined and dough is smooth.
Turn out to floured work surface and roll to 1/3" thickness. Use cookie cutter to cut desired shapes.
Place cookies on baking sheets and bake for 6-9 minutes until beginning to brown on bottom and around edges. Don't overbake or they will be crisp. Tasty, but crisp.
Cool on counter.
Once cooled, frost with desired frosting. I used this one:

Famous Frosting
4 oz. Cream Cheese, softened
1/2 stick butter, softened
1 tsp vanilla extract
1/4 tsp salt
2 cups powdered sugar (sift after measuring)
*whipping cream to thin if needed
In a small bowl, combine cream cheese, butter, vanilla and salt. Beat until combined. Slowly beat in powdered sugar until well combined. Add more powdered sugar or whipping cream until desired consistency is reached.


Stir in food coloring if desired. Frost cookies. Allow to set for 20-45 mintutes before storing.


Little Bites of Heaven

in the form of mini Pecan Pie Muffins! I must say that these are by far some of the tastiest muffins I have ever had the pleasure to enjoy. Everyone at church raves about them when I bring them to potluck breakfasts.


Why mini? Well, they are just so darn cute and these little babies pack loads of flavor and often one mini is enough to satisfy me. Their size makes them easy to transport (I have used empty egg cartons) perfect for breakfast/brunch potlucks when people want to taste a little of everything. Most people go back for "just one more" of these muffins as they can't seem to get enough!

These are by NO means a healthy breakfast muffin (is there such a thing anyway??) but because they are made into mini muffins, you can easily enjoy one with a bowl of fruit and a glass of skim milk to balance out the sugar/butter in these little babies.

I got the recipe from allrecipes but changed it up a bit. My changes are in red. http://allrecipes.com/Recipe/Pecan-Pie-Muffins/Detail.aspx

Mini Pecan Pie Muffins
1 cup packed light brown sugar
1/2 cup all-purpose flour
1 cup chopped pecans (I used 1/2 cup ground, 1/2 cup chopped)
2/3 cup butter, softened
2 eggs, beaten

1/2 cup brown sugar
1/2 TBS ground cinnamon
1/4 cup ground pecans
Preheat oven to 350 degrees.
Grease and flour 18 mini muffin cups or line with paper muffin liners. (I greased and floured, do this or they will stick!)

In a medium bowl, stir together brown sugar, flour and pecans. In a separate bowl beat the butter and eggs together until smooth, stir into the dry ingredients just until combined. Spoon the batter into the prepared muffin cups. Cups should be about 2/3 full.

In a small bowl wisk together 1/2 cup brown sugar, 1/2 TBS cinnamon and 1/4 cup ground pecans. Gently sprinkle over top of muffin batter. Make sure not to get a lot on the pan or it will burn and stick making clean-up hard.

Bake at 350 degrees for 20 to 25 minutes. Cool on wire racks when done. I let cool in pan for 2 minutes and then transfered to rack to finish cooling. Take care when removing from pan as they are delicate and will fall apart easily. I used a toothpick to pry them loose from the sides of the pan when needed.


Sunday, December 16, 2007

Better Than..........

Sex Cake.

There are many names for this cake and many variations. My mom used to refer to this as Better than Christmas cake so my sisters and I could ask for dessert without it sounding "R-rated" or spurring a discussion about the "Birds and the Bees" at the dinner table; especially so when we had friends over.
This cake is my sister's absolute favorite cake. She requests it every year for her Birthday cake. It is so simple to make as it starts with a boxed cake mix, although a homemade one would work as well, but why put in the extra effort when the cake is really just used as a "sponge" to soke up all the ooey gooey goodness in this recipe. I would prefer to bake a cake from scratch when I can truly enjoy its flavor and texture.

As I have said, this cake has many variations and is so versitile. Some recipes call for a yellow cake mix, pineapple and coconut, others use German chocolate cake mix. The possiblities are endless. I will admit that the Yellow cake mix version does not appeal to me in the slightest so I stick to the Chocolate variety. The thing I love about this cake is the longer it sits in the fridge the more moist and delicious it becomes! How many cakes can say that?? This cake is so moist, rich and oh so good. In an attempt to "lighten" it up a bit (especially since the holiday goody consumption is around the corner and my jeans are already a little snug) I modified my usual "recipe" My changes in red.

Better than Christmas Cake
1 boxed Triple Chocolate Fudge Cake Mix (Betty Crocker)
Water, eggs and oil called for with cake mix *I used 1 can Diet Coke in place of all water, eggs and oil
1 12 oz. jarred Caramel Sauce *I used Sugar Free
1 can Sweetened Condensed Milk * I used Fat Free Bordens Sweet and Condensed Milk
1 Butterfinger bar, crushed
1 Skor bar, Crushed
1 tub Coolwhip, thawed *I used Sugar free
1 cup mini chocolate chips

Bake cake according to package directions for a 9x13 pan until a few crumbs come out on a toothpick inserted in center.
After removing cake from oven, use the back of a wooden spoon and poke several holes in the cake, making sure not to go all the way to the bottom of the pan or the carmel and milk will pool and stick to the pan making it hard to serve.

Stir together in a bowl the carmel sauce and Sweet and condensed milk. You can heat carmel slightly in the microwave to make it easier to mix.
Evenly pour mixture over the entire cake making sure to pour some into the holes you poked.
Sprinkle the crushed candy bars evenly over the cake. Cover and refridgerate until ready to serve. Best if allowed to chill overnight.


When ready to serve, frost cake with Coolwhip and sprinkle with mini chocolate chips.

*I like to allow the cake sit out at room temperature for about 15-20 minutes before serving to allow the carmel/milk mixture to warm a bit and create a gooey sauce through out the cake.


Wednesday, December 5, 2007

Channeling Grandma


So, as many of you bloggers may know Peabody from http://www.culinaryconcoctionsbypeabody.com/ is having a virtual open house this Saturday December 8th. In order to attend, you must bring a potluck dish. After much thought and consideration I decided to try my hand at something I have never baked before: a yeast bread.

I enviously drool over the baked items on Peabody's blog and admire her baking abilities almost as much as I envy my grandmother's ability to bake bread like no other. So, I thought this open house would be the perfect time to try my hand at a loaf of yeast bread. Who doesn't love the smell of fresh bread filling a room? So, with that plan in mind I phoned my grandma who sadly informed me that she has no recipe and adds ingredients by sight and feel. Well, a lot of good that does me as she lives 8 hours away!


I decided to turn to http://www.allrecipes.com/ to find a basic white yeast bread recipe. Normally I would buy whole wheat bread, but as I had no whole wheat flour at home, I decided on this recipe http://allrecipes.com/Recipe/Amish-White-Bread/Detail.aspx

Let me tell you this bread ROCKED and I will be making more yeast breads in the future! It had a nice crisp crust, soft dense interior that held up perfectly to a generous slathering of Peanut butter at breakfast.


While bringing a loaf of this delicious bread to an open house would be welcomed, I decided to turn one loaf into bite sized grilled cheese. These little beauties are perfect for passing around at a Housewarming Party with a dab of Ketchup (although I would prefer to have these bite sized morsels with a shot glass full of Roasted Tomato Soup!, Maybe next time
because there WILL be a next time!)


Amish White Bread
2 cups warm water (110 degrees F/45 degrees C)
2/3 cup white sugar (I used 1/3 cup based on reviews and my grandma's advice)
1 1/2 tablespoons active dry yeast
1 1/2 teaspoons salt
1/4 cup vegetable oil
6 cups bread flour

In a large bowl, dissolve the sugar in warm water, and then stir in yeast. Allow to proof until yeast resembles a creamy foam.

Mix salt and oil into the yeast. Mix in flour one cup at a time. Knead dough on a lightly floured surface until smooth. Place in a well oiled bowl, and turn dough to coat. Cover with a damp cloth. Allow to rise until doubled in bulk, about 1 hour.

Punch dough down. Knead for a few minutes, and divide in half. Shape into loaves, and place into two well oiled 9x5 inch loaf pans.

Allow to rise for 30 minutes, or until dough has risen 1 inch above pans. Bake at 350 degrees F (175 degrees C) for 30 minutes.